No edit summary Tag: Source edit |
No edit summary Tag: Source edit |
||
| Line 6: | Line 6: | ||
The default file path on most computers would look like: |
The default file path on most computers would look like: |
||
* For Definitive Edition: <code>C:\Program Files (x86)\Steam\steamapps\common\Outward\Outward_Defed\Outward Definitive Edition_Data\debug.txt</code> |
* For Definitive Edition: <code>C:\Program Files (x86)\Steam\steamapps\common\Outward\Outward_Defed\Outward Definitive Edition_Data\debug.txt</code> |
||
| − | * For |
+ | * For Vanilla: <code>C:\Program Files (x86)\Steam\steamapps\common\Outward\Outward_Data\debug.txt</code> |
By creating and adding this .txt file, the user gains access to several developer-only features, described below. |
By creating and adding this .txt file, the user gains access to several developer-only features, described below. |
||
Revision as of 18:49, 17 May 2022
Debug Mode is modified game state in Outward. There are various helpful tools when Debug Mode is active such as restoring backup saves or spawning lost items, but it is not recommended to leave it on all the time.
How to Enable Debug Mode
The Debug Mode is enabled with the simple addition of a blank file called DEBUG.txt being added into the Outward_Data folder of the games installation, or the Outward_Defed/Outward Definitive Edition_Data folder for the Definitive Edition.
The default file path on most computers would look like:
- For Definitive Edition:
C:\Program Files (x86)\Steam\steamapps\common\Outward\Outward_Defed\Outward Definitive Edition_Data\debug.txt - For Vanilla:
C:\Program Files (x86)\Steam\steamapps\common\Outward\Outward_Data\debug.txt
By creating and adding this .txt file, the user gains access to several developer-only features, described below.
Note: On certain operating systems, an additional hidden ".txt" may be added onto the end, which would result in the file name being "DEBUG.txt.txt". In this case, renaming the file to simply "DEBUG" may allow the developer tool to work, or enabling "Show File Extensions" in your operating system settings.
Load Backup Saves
If Debug Mode is enabled, the player can choose from any of their 15 previous save-states from the main menu - the options appear when "continue" is pressed on the desired character.
This effectively gives the ability to roll back character progress. Combined with the "save" button on the F2 Menu, this allows the player a great degree of control over their progress, and can be helpful if wanting to test out other potentially risky features of Debug Mode.
F-Key Menus
Once a character is loaded, 4 menus become available which are accessed with the keys F1 to F4.
F1: Item and Object Spawner
The item spawner is a simple menu which can spawn almost every item in the game. This also allows for the spawning of NPC-only armor and weapons, or old entities and items not used in the final version of the game.
For stackable items, you can spawn multiple at once by selecting the item and dragging the "Quantity" bar at the bottom to the right.
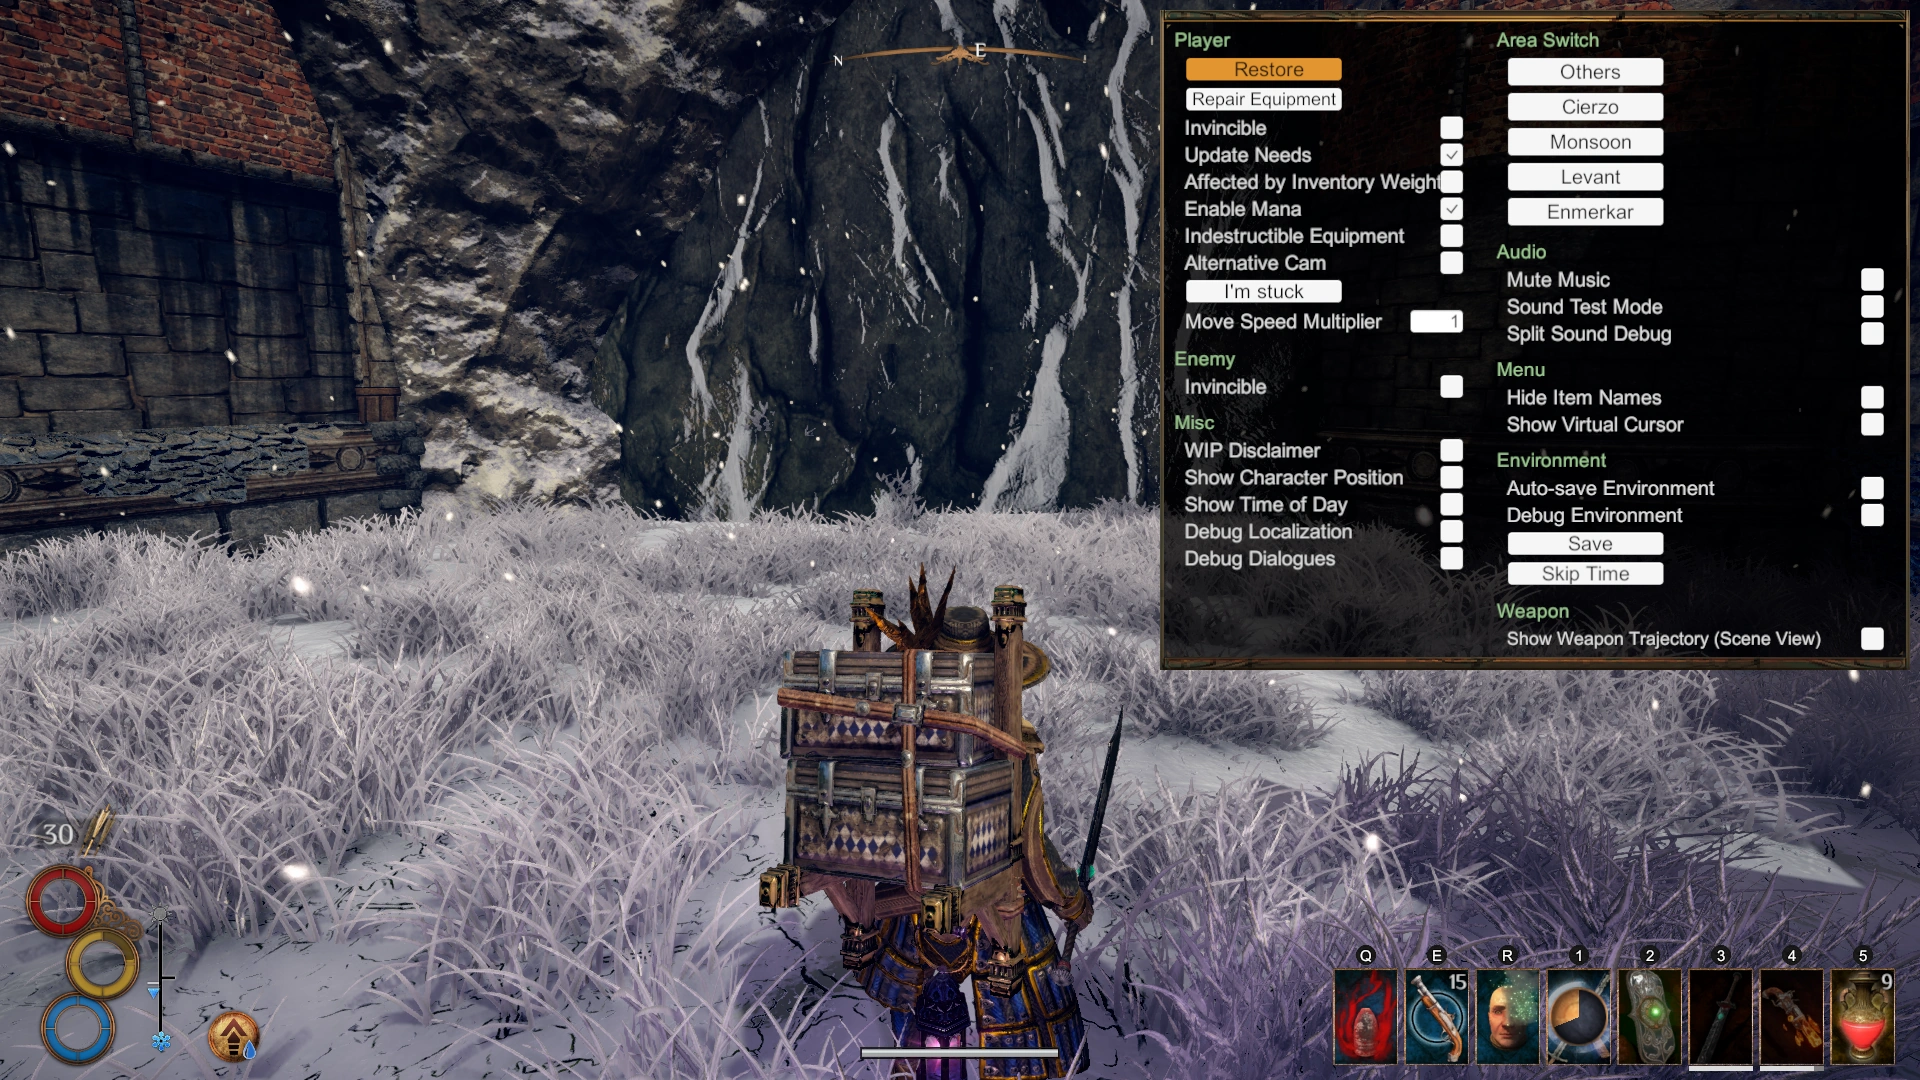
F2: Player / Environment Cheats
This menu includes things like making the player invincible, an "unstuck" button, showing time of day, and even things like move speed multiplier. Users should be careful about turning the movespeed multiplier up without invincibility on, as you can easily kill your character by running over hills. Some important settings include:
- Invincible: Player cannot take damage.
- Enable Mana: Grants the player 100 Mana and sacrifices 25 Health and Stamina.
- "I'm Stuck" button - moves the player randomly a short distance.
- Enemy - Invincible: Makes enemies invincible.
- Area Switch - teleport to any "Scene" in the game.
- "Save" button - immediately saves current progress and world status.
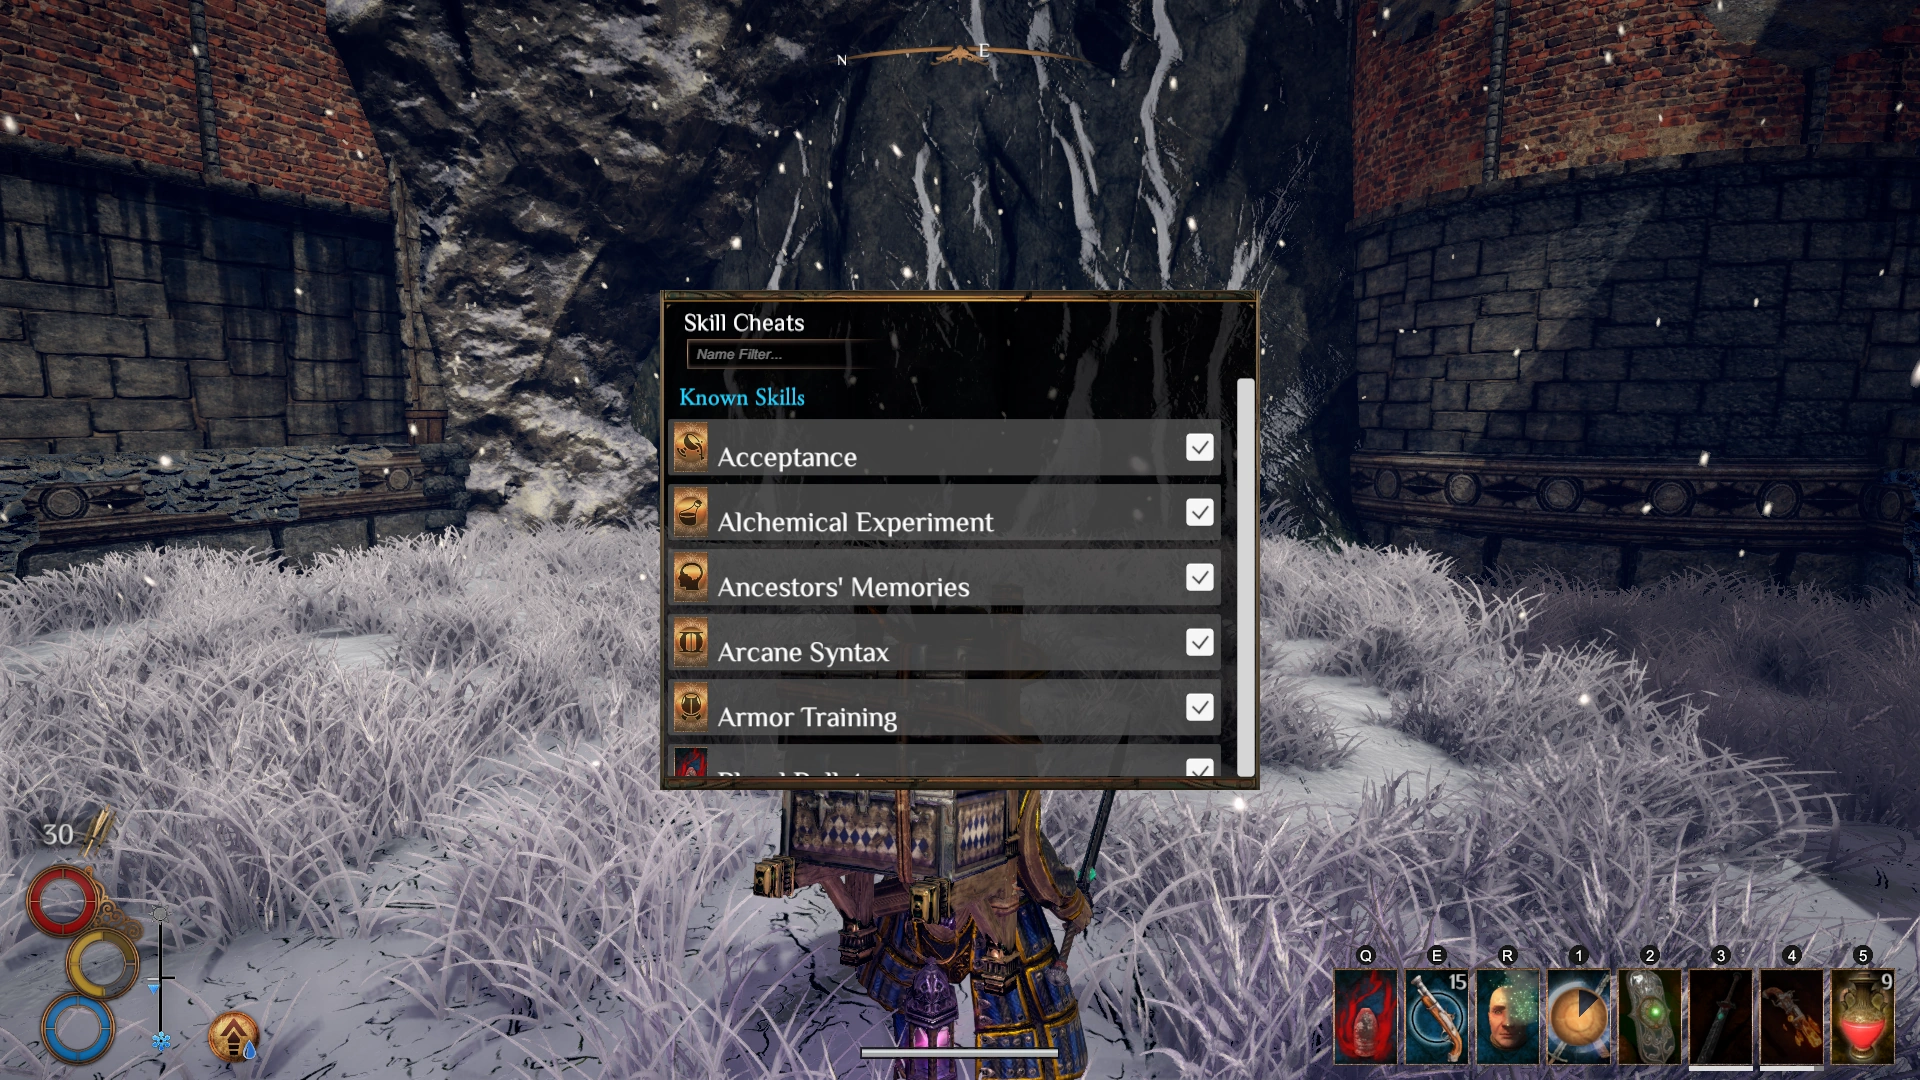
F3: Skills
Another relatively simple menu, this one gives access to unlock all skills individually for use by the character.
F4: Quests
A menu designed to track the player's quest events, or "triggers" in general (I.E. quest progression). By looking at this menu, one can estimate the outcome of the quest, or even modify the outcome by changing values of certain quest event, or adding quest event. Unless the user has good idea what they're doing, they shouldn't be messing around with this menu as it could lead to a soft-lock, or even potentially a ruined save.
Free Camera and NoClip
Shift+<will activate NoClip and Free CameraShift+>will toggle whether or not the player moves with the Camera and disappears from view, or remains in place and visible to the camera.Left Shift+Nwill display some information about the free camera, allowing you to adjust the speed and other settings.
If the camera moves to some location very far off screen when you activate the Free Camera, press Shift + <, then Shift + >, then Shift + < again. Pressing the second combo without the first combo will result in the character teleporting to this random location, which is probably not desired.
Show Combat Stats
Pressing Numpad Divide (/) will reveal Health, Stamina, Mana and "Needs" stat numbers for the player, as well as Health and Stability values for enemies.
Other Functions
9: Sit animation10: Folded arms animation-: "Gather" animationNumpad 1ORMouse 5: Slow-motion gameplayNumpad 4: Kill selfNumpad 6: Adds a test (debug) status effectNumpad 7: Removes ALL status effects.Numpad 8: Restores player's Health, Mana and Stamina, and Skill CooldownsNumpad 9: Take Damage TestNumpad Period: Inverts up/down cameraLeft Ctrl+Left Alt+S: Force Environment SaveLeft Ctrl+Left Alt+L: Reload Current SceneLeft Ctrl+Left Alt+X: Open Photon Network RoomLeft Ctrl+Page Up: Set Next Graphics SettingsLeft Ctrl+Page Down: Set Previous Graphics SettingsLeft Shift+O: Open GUILeft Shift+U: Player RagdollLeft Shift+H: Show / Hide User InterfaceF12: Take Screenshot (for some reason this is bugged and causes white screen, reloading the current scene will fix it
Gallery

Item Spawn Menu
Player/Environment Cheats Menu
Skill Menu

Save Debug Menu